The job
A typical indoor ceiling: about 10 m of warm-white pixel tape in a cove or on the plaster, switched from a normal 240 V wall switch. The client does not want an app, a remote, or a laptop on site. They want this:
- Switch on — the tape fills from the start of the run to the far end, then stays fully on.
- Switch off — everything goes dark.
- Switch on again — the same fill, then it holds until the next off.
They know there are advanced pixel processors that can do almost anything. Those units need software, addressing and a written show. For this room they wanted something simple, ready to use, and realistic to install as a DIY or small-trade job.
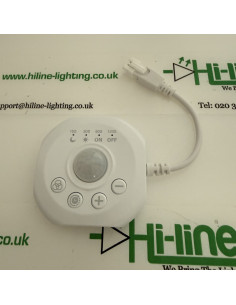
The controller that does that on Hi-Line WS2811 tape is the PIR SPI pixel controller (HL-PIR-SPI). It is a small indoor puck with the looks already on the unit. You pick one, store it, and it runs when 24 V comes up.
How the wall switch is wired
The wall switch is on the 240 V AC supply to the LED driver. It is not switching the 24 V tape itself.
- The existing (or new) wall switch interrupts the live to a non-dimmable 24 V constant-voltage driver.
- The driver output (24 V DC) feeds the PIR SPI controller.
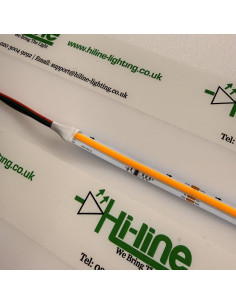
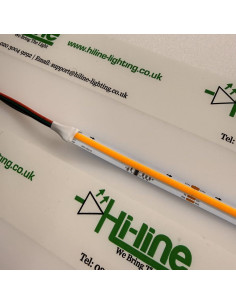
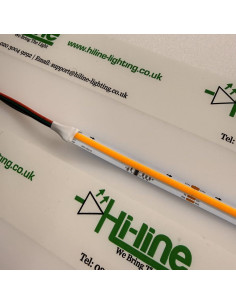
- The controller’s 3-pin lead goes to the start of the WS2811 tape (arrows on the strip point away from the plug).
When the switch is on, the driver is on, the controller has 24 V, and the stored look runs. Set the controller to Always-on (ON) for this ceiling job. The fill-then-hold look is one of the built-in presets: light travels along the 10 m, then the whole run stays on until you cut the mains at the wall.
Do not use a mains-dimmable driver here. The wall plate is on/off only. Colour and the chase sit in the pixel controller, not in the PSU.
The controller is indoor, IP20. It is not a wet-rated box. Keep it in a dry void or cupboard. The tape and the driver can be a different IP rating from the puck — that is normal.
Parts for this 10 m ceiling
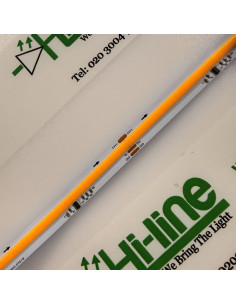
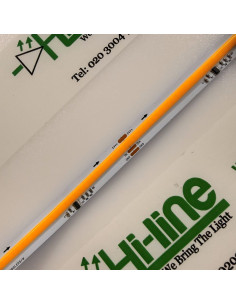
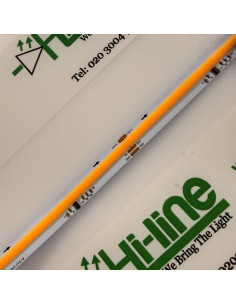
This example uses one 10 m roll of 24 V WS2811 COB at 10 W/m, so the tape is about 100 W. That is the load the driver must cover. A 10 m run of this tape can take its power through the controller; extra + / 0 V along the copper is only needed on longer runs, where voltage drop shows at the far end.
| Qty |
What |
Why |
| 1 |
HL-PIR-SPI |
Ready-programmed WS2811 pixel controller. Always-on for the wall switch; PIR and hold times for stairs (below). |
| 1 |
10 m WS2811 COB warm white 24 V 10 W/m |
The ceiling run. Cool white 10 m is the same family if the room wants a cooler CCT. |
| 1 |
100 W 24 V IP67 Premium driver |
Matches the 10 m load. Sealed supply for a ceiling void, loft or anywhere you want a covered PSU. |
Cool-white sister roll if needed: 10 m WS2811 COB cool white. Shorter rooms and many stair soffits can use the 5 m warm-white roll with a smaller driver.
WS2811 tape is directional. Join only at the start of the run. Do not mix this controller’s 3-pin map with other 3-pin plugs in the shop — pinouts are not all the same. The product PDF shows the plug used on this puck.
IP67 driver or indoor EC series?
Both are 24 V constant-voltage, non-dimmable supplies. Choose by where the driver will sit:
- IP67 Premium 100 W — HL-100W-24V-IP67-5Y. Encapsulated. Use this when the PSU is in a void, a dusty loft, or anywhere you want the electronics covered. Five-year Premium series.
- IP20 EC series 100 W — HL-100W-24V-IP20-EC. Indoor dry only (a cupboard, a plant room, a properly ventilated enclosure). Slim aluminium EC housing, DIP-switch current/watt options on that family. Smaller and usually the keener indoor price.
The wall switch still sits on the 240 V input of whichever driver you pick. The 24 V output is what the PIR SPI puck and the tape share. Do not leave an IP20 EC driver in a damp ceiling or outdoors.
The same controller has a PIR and hold times
The puck is not only a wall-switch box. It has a built-in PIR in the centre, with Night / Day / ON / Off and hold times of 15 / 30 / 60 / 120 seconds after the last motion. Always-on ignores the sensor and runs whenever 24 V is present. The other modes use the sensor.
That is all on the unit — there is no app and no file to load. Read the HL-PIR-SPI user manual (PDF) before you install: buttons, look selection, brightness, speed, pixel count, and how Night and Day behave. The listing page is PIR SPI pixel controller for WS2811.
This is a simple, ready-programmed controller. You step through the built-in looks with + / − and they stay stored with the power off. It is meant for this kind of DIY and small-trade job, not for a mapped architectural show.
Stairs as a simple DIY system
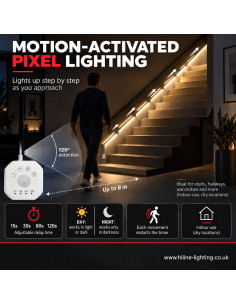
The same parts work on a stair soffit or stringer when you want occupancy rather than a wall switch.
- Mount the puck so the PIR can see the approach (top, bottom, or the side of the well — check the detection angle in the PDF).
- Leave the 24 V driver live (or on a local isolator for maintenance). Do not use Always-on for this use; use a sensor mode and a hold time.
- Someone walks in — the pixel tape fills along the stair, then stays on for 15, 30, 60 or 120 seconds after the last movement. Walk again and the timer retriggers. When the time expires, it goes off until the next detection.
That is a one-tape DIY stair light: one WS2811 run, one puck, one 24 V driver. It is not a 32-channel per-tread sequencer and it does not give a separate lamp on every riser. If you only need the soffit or the inner stringer to come on as a travelling line, this is the simple route. Size the tape and the driver to the length (5 m is enough for many domestic stairs; 10 m covers a longer well).
Keep the puck indoor and dry. Stairs in a heated house are fine. External steps, a wet cellar, or a PIR that has to sit in weather need a different product.
When this puck is not the right tool
Pixel processors that need software, pixel maps, Art-Net, sACN or a written timeline exist, and they are the right answer for theatres, mapped façades and large colour-changing jobs. They are also more to install and more to support.
This controller is the other end of that scale: a few buttons, a stored look, a wall switch or a PIR. We do not custom-program this puck for special sequences.
If the project is larger, or you need a written effect, two-way stair logic, mapped pixels, DMX or a control system already on site, that is a different class of hardware. Email us with the length, indoor or outdoor, and what the lighting has to do. We can look at a custom-programmed route for those requirements — not by loading extra code onto this simple controller.
Installer checklist
- WS2811 tape only, voltage matched to the tape (this example is 24 V).
- Wall-switch ceiling: switch the mains into the driver; set the puck to Always-on; pick the fill-then-hold look.
- Stairs: leave 24 V up; set PIR mode and a hold time; aim the sensor; read the PDF.
- 10 m of 10 W/m tape → about 100 W → 100 W 24 V driver (IP67 Premium in a void, IP20 EC in a dry cupboard).
- Feed the start of the tape. Extra 24 V injection only if a longer run starts to drop at the far end.
- Qualified person for the 240 V side. Indoor dry location for the puck.
Disclaimer
Hi-Line Lighting supplies products only and does not provide on-site installation, technical consultancy, or a full lighting design service. This article is general guidance for a typical 10 m indoor WS2811 ceiling switched from a 240 V wall plate, and for a simple one-tape PIR stair using the same controller. All calculations, wiring, safety checks and regulatory compliance must be carried out and verified by a qualified installer. Incorrect design or installation can cause overheating, equipment damage, or fire.
If you do not have a lighting designer and need help on a larger or more complex project, contact us. We can put you in touch with trusted external partners.
Need a similar kit?
Email [email protected] with the run length, warm or cool white, whether the driver will sit in a dry cupboard or a void, and whether you want wall-switch Always-on or PIR stairs. If you receive an automated reply with a ticket number, keep it. If you do not receive that reply, please call to confirm the message arrived.